


Custom Scenes
How to upload a wall image and design Wall Art layouts to scale directly in your client's space.
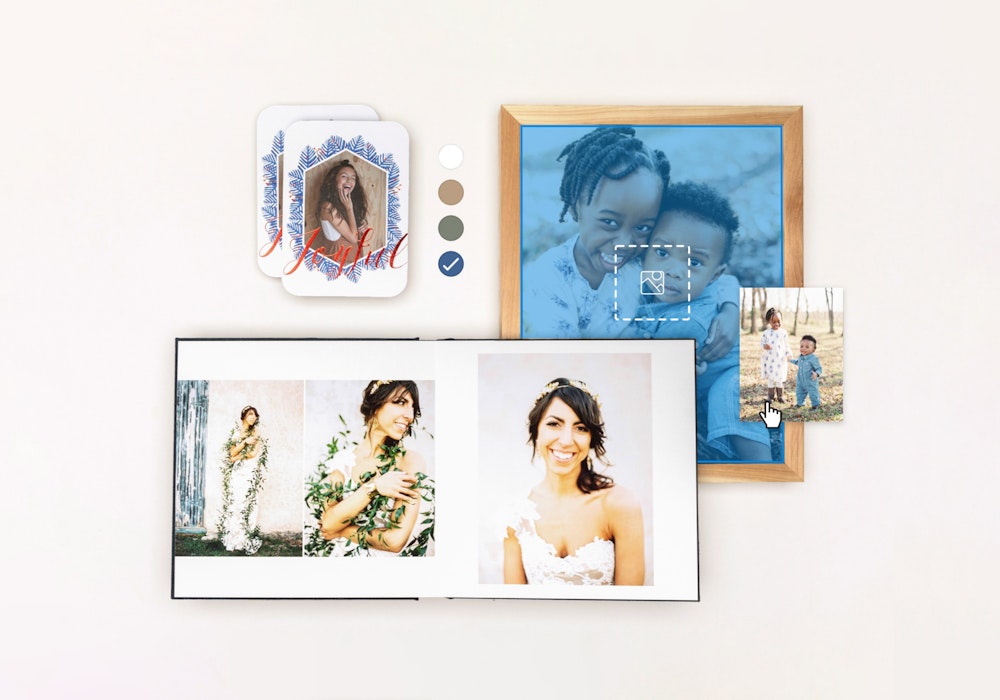
When creating custom wall collages using our Gallery Wall Designer, you have a few options to choose from under the "Scene" menu in the sidebar.
- Auto adapts a default scene image to the size of your wall arrangement
- Blank provides an empty wall canvas
- Upload Scene allows you to upload your own scene image and calibrate the scale
Benefits of Using a Custom Scene
By uploading an image of a wall in your studio space, a client's home, or anywhere else you wish to install Wall Art, you can create true to scale layouts that visualize how the products will look in context. This helps take the guesswork out of answering common questions such as "What will look good here?" or "What size prints will fit in my space?"
Presenting your gallery wall designs within the context of where they will be displayed is also a tool to assist you in closing the sale. It brings your vision to life in a more tangible way that both inspires and boosts confidence in saying yes.
How to Upload a Custom Scene
- Open a Gallery Wall Designer. You can start from scratch or use one of our pre-designed layouts as a starting point.
- In the sidebar, select "Scene" and then "Upload Scene" from the list of options.
- Select the image file of your wall from the file selection menu that opens (must be a JPG or PNG file).
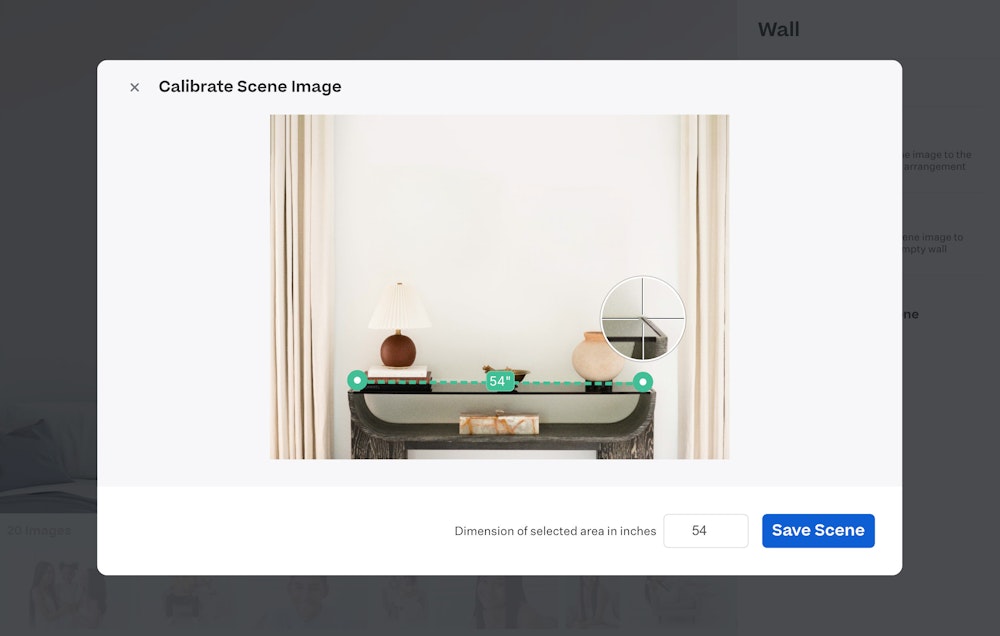
- You will be presented with a "Calibrate Scene Image" dialog when your file uploads. Here, you will position the handles of the ruler on either side of an object in the image you know the dimensions of in inches. Then enter that dimension in the input field and select "Save Scene."
- Your calibrated custom scene is now available for use—start adding products to create your desired layout.
Tips for Photographing a Scene
Here are a few ways to get imagery of your client's walls to use as a custom scene.
- Take the images yourself by visiting their home, business, etc., before your shoot. This could be part of your consultation process or even happen on the day of the shoot if it takes place at that location.
- Conduct the sales session in your client's home and spend a few minutes photographing areas that would be a good fit for Wall Art.
- Have clients send you images. We suggest providing some simple guidance for them on how to photograph the walls and ensure they include an item you know the measurements of.
Don't forget to measure an item in each wall scene and keep track of those measurements so you can accurately calibrate while uploading the custom scene.
Measurement Guidelines
Include an object of known size in the scene. For the most accurate calibration, this item should be up against the wall plane and parallel to the camera. Measure something right up against the wall whenever possible. Examples that work well for this include:
- Furniture that is already pushed up against the wall in the space, such as the back of a couch, console table, or bed.
- Window or doorframes on the same wall where the prints will be installed.
- Existing art on the wall that you will be adding additional prints to.
- If you are working with a wide open wall area, you could alternatively:
- Place two pieces of tape on the baseboard to measure between, just ensure they are noticeable enough in the final image to be able to place the ruler handles while calibrating.
- Temporarily add an object up against the wall, such as a box, large planter, etc.
We do not recommend using very small objects, such as outlet plates, as they can reduce the accuracy of the calibration.
Angle Guidelines
Images that are level with the floor and straight on work best to create more realistic mockups. We also suggest avoiding wide-angle lens distortions or correcting them using an image editing tool like Adobe Lightroom before uploading.
Subject Guidelines
Keep the area where the gallery wall will hang clear, or consider editing out anything in that area that would be removed to make space for the new gallery wall.
Ensure there’s plenty of space for the gallery wall and show context. Avoid zooming in or cropping the scene so tight that you remove the ability for viewers to understand where this area is in their space and how the gallery wall will interact with other objects in that area.
Lighting Guidelines
Well-lit spaces with soft shadows help create more realistic mockups. Avoid harsh shadows or dramatic lighting, and photograph the space using daylight if possible.